
Theme and Layout Templates

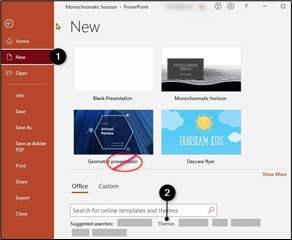
PowerPoint contains various built-in themes that are already accessible. Selecting one of them is a great way to start creating an accessible presentation. You can select a theme when starting a new slide deck or by selecting the Design tab. Be sure to choose a theme with good contrast and simple backgrounds.
Presentation Decks
It is not recommended to use fully prepared presentation decks as, they can make accessibility compliance more complicated. These are typically indicated by the word “presentation’” in the title.
Slide Layouts
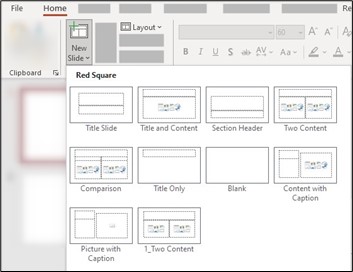
One of the most important parts of PowerPoint accessibility is the use of slide layouts. When adding a new slide to a PowerPoint presentation, it’s best to use the available layouts built into the program. These layouts contain placeholders for text, videos, pictures. etc., and are designed so that the reading order is the same for people who see and people who use technology such as screen readers.
To use a slide layout, select the Home tab, then New Slide, and a menu of slide layouts will appear.
Slide layouts can be changed by editing the Slide Master in the View ribbon. To learn how to change a slide master review the Microsoft tutorial: Customize a slide master.
It is best to avoid adding any text boxes or adding items on top of the content placeholders already provided in the layout templates. When you manually add a text box, image, or any other object, it will affect the reading order of the slide.
Slide Title
- All slides need to have a unique, meaningful title. This allows the reader to know what information is on each slide. It also helps with navigation, as a screen reader user can quickly scan through a list of slide titles and go right to the slide they want.
- If content spans across multiple slides, include “continued” in the title to indicate that the content is carrying on from the previous slide.
- For multiple similar slides, you can include the number of total slides such as ‘Slide Title 1 of 2’.
- Where appropriate, the title can be hidden from view so that it is only be read by screen readers. For more information, review the Microsoft guide on hiding a slide title.
Outline View

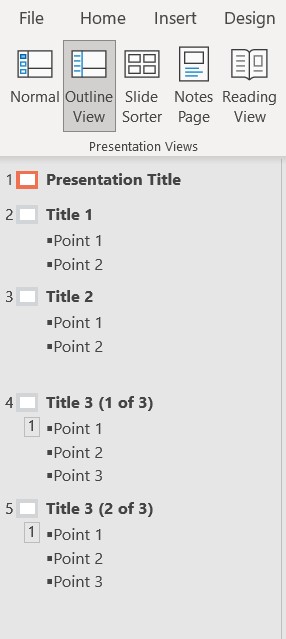
The Outline View can be used to ensure slides are logically sequenced and slide titles are meaningful. To view the outline, go to the View tab and select Outline View.
Text
Accessible font size for PowerPoint presentations is different to a standard document because the presentation needs to be readable by everyone in the room. Use a font size of 18-point or above. Be aware, when your content exceeds the border limit of a context box, it automatically reduces the font size. The screenshot below shows the automatic reduced font change when two extra lines are added.

Use a sans serif font such as Calibri, Trebuchet, Helvetica, or OpenDyslexic. Serif fonts typically have small embellishments at the end of the font strokes and can be difficult to read at certain sizes (e.g., Times New Roman, Garamond, and Harrington). Keep the slide background simple — do not present text over watermarks or images.
Spacing
Use clear, consistent layouts and organizations schemes for presenting content. Do not overcrowd slides with too much content. Follow the 7×6 rule: for every slide, use no more than seven lines of text — or seven bullet points — and no more than six words per line. Slide titles aren’t included in the count. This will help make your presentations easily readable and understandable to the audience.
If you want to add more in-depth detail, use the speaker notes feature and distribute your PowerPoint presentations to your audience so they can refer to them during and after the presentation. This article by Microsoft explains how to add speaker notes: Add speaker notes to your slides (microsoft.com)
Colour and Contrast
- The colours you choose are an important part of your content creation as it can impact people that you’re not even aware have disabilities such as those with colour-blindness or low-vision impairments.
- Do not use colour alone to convey meaning or indicate importance.
- It’s better to indicate important concepts by using underlined or bolded text. Screen readers can detect these font features easily which will communicate the importance to the user.
Contrast Ratio
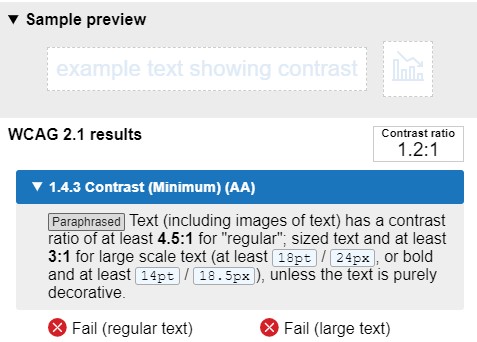
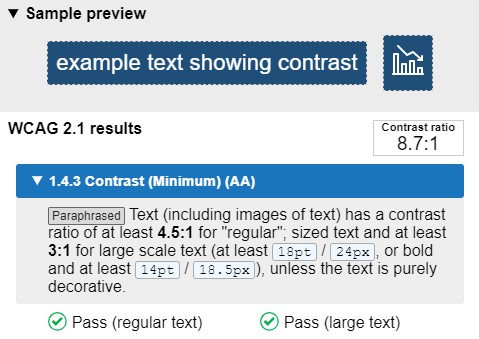
When text contrasts poorly with its background, it makes reading more difficult, especially for people with low vision. Ensure there is sufficient contrast between text and the background you are using i.e., a contrast ratio of at least 4.5:1 for normal text and 3:1 for large text. A light background and dark text or dark background and light text will typically achieve good contrast, however a Colour Contrast Analyser can be used to make sure the contrast is sufficient.
Contrast Fail Example
Contrast Pass Example
A very high colour contrast can make reading difficult for some people, especially those with dyxlexia. Choosing an off-white background colour such as cream can help reading in this case.
Listed Items
When creating a list, use the PowerPoint Listing functions as opposed to typing numbers or dashes to denote list items. This makes the content more accessible as screen readers can identify properly formatted lists and determine how many items are listed.
To create a list:
- Go to Home tab.
- In the Paragraph section, click either Bullets, Numbering, or Multilevel List options.
Non-Text Content
Alternative Text
Alternative text, also known as alt text, is a text description of non-text content such as an image, chart, SmartArt, or other graphical elements in a presentation. When a person uses a screen reader or text to speech software, alt text allows them to hear a description of the non-text content. Alt text must be added to any non-text content that conveys a meaning or adds relevance to the presentation.
To add alt text:
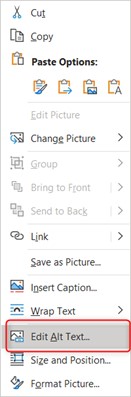
Right click on the object and select Edit Alt Text.
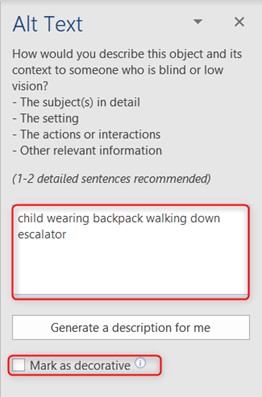
In the Alt Text pane, describe the object and its context. There is no need to add “image of …” before your description because the screen reader will indicate that it is an image.
If the image offers no information or meaning, select the Mark as decorative checkbox and a screen reader will skip it.
This article by Microsoft will help you understand how to write effective Alt text: Everything you need to know to write effective alt text (microsoft.com)
Graphs, Charts and SmartArt
Alt text may not be sufficient to describe the information displayed in complex images such as, graphs, charts, and SmartArt. In these cases, figure captions or in-text descriptions can be used to provide longer descriptions.
To add a caption:
- Right click on the object and select Insert Caption.
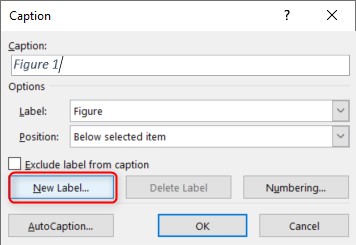
- A default option for your caption will be generated. If you’d like to create your own select New Label and enter your caption into the pop-up dialog box.
Video and Audio
To make presentations with video and audio accessible, transcripts and/or captions must be included.
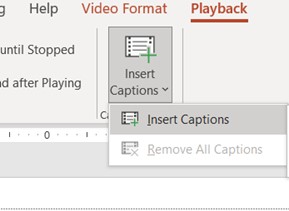
To add closed captions to a video:
- Select the video on the slide.
- On the Playback tab, click the Insert Captions button, and then select Insert Captions.
- In the Insert Captions dialog, browse to your caption file. Select the file and then click Insert.
Note: Currently, only PowerPoint for Windows allow you to add captions or subtitle files to a video within a presentation. For all other editions of PowerPoint (such as PowerPoint for macOS or the mobile editions), closed captions or subtitles must be encoded into the video or audio file before they are inserted into the presentation. For information on creating captions, refer to the Captioning Using MS Stream article.
To learn how to make your video accessible, review the Video Accessibility article.
Tables
Tables can create challenges for people using assistive technology.
To create an accessible table click Insert > Table and select the number of columns and rows you want by highlighting the gird.
Do not use the Draw Table tool as this makes it difficult for the table to be read by a screen reader.

Table Structure
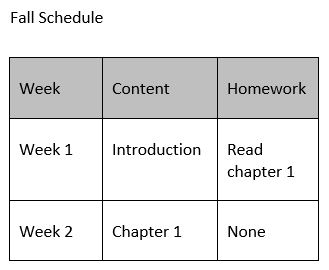
Use simple tables structures. Do not merge or manipulate other table elements. Tables with merged cells can add considerable complications for screen reader users because it affects the reading order.
Table with merged cells
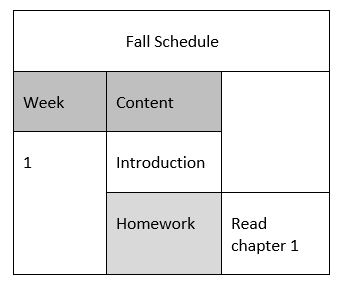
Table without merged cells
There are times when complicated tables are the best way to communicate information. When this happens, be sure to keep it as simple as possible or split the information into multiple tables.
Do not use images in tables.
Table Headings

Tables should include a Heading Row. To add a heading row, click the table and go to the Design tab. Check the Header Row check box and choose a table style.
Table Alt Text
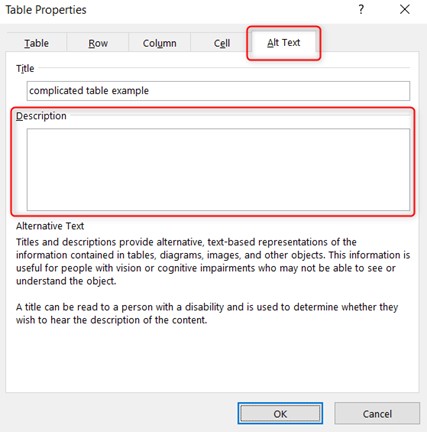
Add alternative text to your table:
- Right-click the table and then click Table Properties.
- In the Table Properties dialog box, click the Alt Text tab.
- Type a detailed description of the table, and describe the important details/message the table is conveying.
Hyperlinks
Hyperlinks are used to link your presentation to websites or other sections in your presentation. When using a hyperlink in a presentation, it’s imperative to use descriptive text that accurately describes where the link leads to. This is important for two reasons:
- Long confusing web addresses or non-informative phrases such as “click here” offer little insight to the average person about what it refers to.
- When a person who uses a screen reader encounters a URL, it will read every word and dash of the URL aloud making it confusing to follow.
Descriptive hyperlinks make it easier for the users to navigate and understand the reason for the link. You can add a descriptive hyperlink to almost all document creation programs.
Adding Descriptive Hyperlinks
Select the text that you want to display as a hyperlink, then right-click on the text and click Link (or press Ctrl+K).
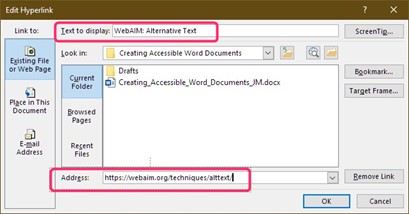
In the Insert Hyperlink box, type or paste the website URL in the Address box.
Add the descriptive text for your hyperlink in the Text to display box.
If you have pasted a website URL directly into your presentation, you can edit the hyperlink by right clicking the link and choosing Edit Hyperlink. Edit the display name by adding descriptive text to the Text to display box.
The newest version of the Microsoft Edge web browser automatic creates descriptive hyperlink text when copying and pasting from the browser. See the Improved copy and paste of URLs in Microsoft Edge article for details on how to use this feature.
Reading Order
An important step in making presentations accessible, is ensuring the reading order for each slide is correct. The reading order determines how the presentation will be read aloud with a screen reader and sets the tab order for keyboard users. If the reading order is not set correctly, a screen reader reads the items of a slide in the order in which they were added to the slide, which might be very different from the order in which things appear visually. You want to make sure these users can read or tab through all the items on the slide in the order you intended.
How to Check Slide Reading Order
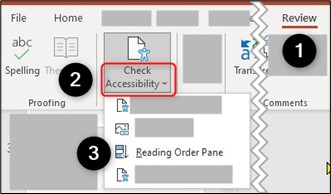
- Select Review tab.
- Select Check Accessibility.
- In the drop-down menu, select Reading Order Pane.
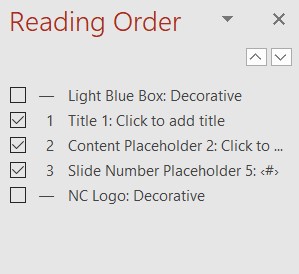
The items in the Reading Order Pane are listed in the order that a screen reader will read them. The number next to each item indicates the position in the sequence. Items without a number will be skipped because they are marked decorative.
To change the order that the objects are read in select one or more items in the list and drag the selection upward or downward or click the up arrow (Move Up) or down arrow (Move Down).
For more information, review Microsoft article on using the reading order pane: Make slides easier to read by using the Reading Order pane (microsoft.com)
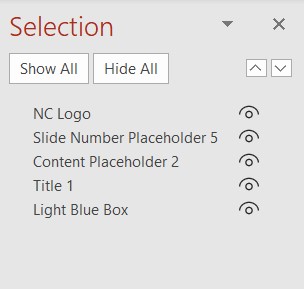
The Selection Pane can also be used to check the reading order however, in the Selection Pane, the reading order is from bottom to top i.e., the item on the bottom is in the item that will be read first. The items can be rearranged by either dragging them to the desired order in the list or using the re-order button in the Selection Pane.
Animations and Transitions
Transitions and animations should be simple. Complex or automatic animations and transitions can be very distracting from the central message, and in some cases, too much flashing or movement can induce seizures. If animations are too delayed, they may be missed by assistive technology.

If you are using animations or transitions, it’s recommended to add them to your slides using the On Click option, rather than setting a time for them to appear. This allows the viewer to control the speed at which they view the content and progress through the slides.
Presentation Properties
Descriptive Title
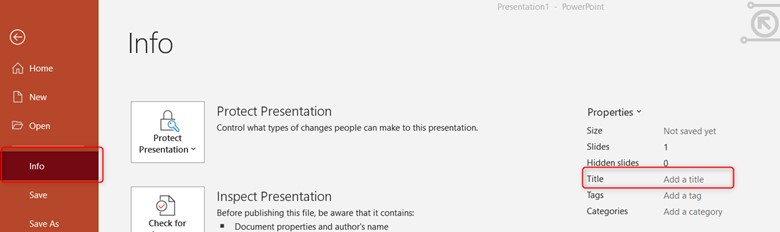
Adding a title to your presentation information allows screen reader users to preview presentation information without opening it. This can help limit the necessity of opening a presentation to determine if it’s the one they’re looking for.
To add a descriptive title, click File > Info. The title is located under the Properties section.
Meaningful file name
Be sure to use a meaningful name for your presentation. This will make is easier for users to find. For guidance on how to add meaningful filenames and descriptive titles to your presentations check out the Video: Create accessible file names (microsoft.com).
Accessibility Check
To check the accessibility of your presentation, use the built in MS PowerPoint accessibility checker tool. The article Using the Accessibility Check in the Microsoft 365 Office Suite explains how to use this tool.
Presenting in the Classroom
Live Subtitles
PowerPoint now has the capability to create live (real-time) captions while you are presenting. You can also choose which language you want to speak while presenting, and which language the caption/subtitle text should be shown in (i.e., if you want it to be translated).
To learn how to use this feature, review Microsoft’s Present with real-time, automatic captions or subtitles in PowerPoint guide.
Present Live
PowerPoint has a feature called Present Live that allows attendees to see a presentation on their devices and read live subtitles in their preferred language while you speak. They can use “pinch to zoom” to see the slides more clearly on mobile devices, give feedback, send live reactions to the presenter, and navigate back to review previous slides.
This tool is available through the web version of PowerPoint. By automatically presenting a QR code and link, it delivers your presentation and subtitles directly to attendee’s devices. This means attendees can zoom in to see details better or catch up when they missed something during a moment of distraction.
To learn how to use Present Live, go to the following Microsoft Present Live: Engage your audience with Live Presentations article.
Additional Resources
- WebAIM: PowerPoint Accessibility
- Make your PowerPoint presentations accessible to people with disabilities (microsoft.com)
- Accessible Documents Checklist: PowerPoint
- Disability Answer Desk Support | Microsoft Accessibility
Note: These instructions apply to the current desktop versions of the Microsoft 365 Office Suite as of December 2021.